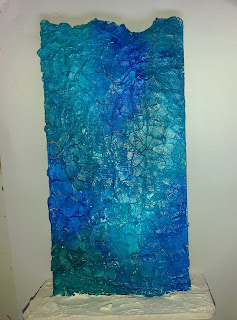
Happy Hallowe’en everyone, hope you are planning lots of
spooky going ons. For my make today on the That's Crafty blog I have used a That’s Crafty! Upright which as soon I
saw I thought would make a great tombstone for tonight’s festivities. For details of what I used and how I made it please call over to the That's Crafty! blog.
Monday, 31 October 2016
Friday, 28 October 2016
Friday 13th Part 2
Friday 13th Part 2 is the theme for the new challenge over at That's Crafty!. I have made a Hallowe'en card using a Dina Wakley stamp and assorted rub ons.
Why not pop over to the challenge blog and see what my team mates have made and for details of how you could win a £20 Gift Voucher
Monday, 24 October 2016
Hunter's Moon
Last Weekend on Sunday night we had a “Hunter’s Moon”. The Harvest Moon is the full moon nearest the
autumn equinox and the Hunters Moon is the first full moon after that. Both moons are close to the equinox and
appear in the sky earlier than usual. You can usually see the moon rising in
the sky around the same time as sunset, and because it’s near to sunset, it can
take on a red or orange colour. The orange hue is because when you stare at the
horizon to watch the sunset and low moon, you are looking through a thicker
layer of atmosphere than if you are gazing straight up. The atmosphere scatters
blue light but allows red light through to our eyes. Whereas the glow of the Harvest
Moon helped farmers to gather crops as the daylight hours got shorter, the
Hunter’s Moon gave extra light to hunters looking for deer, boar or other prey
destined for dinner. This has inspired my picture this week.
I have chosen a Wolf as my hunter as October is Lupus
awareness month and as some of you may know I have SLE form of this disease, and
Lupus means Wolf chosen originally as people with Lupus often have a skin rash
which was thought to look like they had been attacked by a Wolf. The butterfly is the official symbol of the disease
because the face rash is the shape of a butterfly with open wings, but for this
October I am embracing my inner Wolf.
For more details of what I used and how I made my picture please pop over to the That's Crafty! blog
Monday, 17 October 2016
Heart of Gold
This week I am sharing the reverse side of my That's Crafty! Upright from last week, again heart themed but a happy heart not a broken one. Full details are on the That's Crafty! Blog.
Friday, 14 October 2016
Clean and Simple
Clean and Simple is the new theme at the That's Crafty! Challenge. This is my sample, perhaps minimalist would be a better description of what I've done. Pop over to the Blog and see what my team mates have made and for details of how you can win a £20 Gift Voucher.
Monday, 10 October 2016
A Broken Heart Bleeds Tears
That’s Crafty! Have just launched last week on Hochanda
three new ranges of products – Clocks, Dream Catchers and MDF Uprights, all in
different shapes and designs. I had this
fabulous Jagged Edge made from MDF to work on.
These can be decorated with the same theme front and back or two
different themes. I chose to go with two
connected but different themes for this one, so I am sharing one side today and
the other side next week.
For more details call over to the That's Crafty! blog
That’s Crafty! MDF Jagged Edge Upright
One large That’s Crafty! MDF Hearts
DecoArt - Texture Crackle, Gesso, Gloss Gel
DecoArt Media Fluid Acrylics – Primary Cyan,
Cobalt Teal Hue, Cobalt Turquoise Hue, Transparent Yellow Oxide,
Transparent Red Oxide, Quinacridone Burnt Orange and Quinacridone Gold
Finnabair
Glossy Accents
Glass Beads –Ruby
Embellishments - Rusty Wire, Glass Tear Drop Bead, dried
coffee grounds
I added a very thick coat of Texture Crackle and when dry
glued the Upright to the base with Gloss Gel and gave the whole and all 3
Hearts a light coat of gesso. When dry I used a mix of the 3 blue/green paints
to give a base colour.
For the Heart I snapped it in half (to be honest I got
hubby to do that bit) and added the
coffee grounds then a first layer of Transparent Yellow
Oxide, followed by a layer around the edges of Transparent Red Iron Oxide ( and finally a layer of Quinacridone
Gold over the whole surface.
I cut out strips of cardboard to sit behind the heart
pieces and give them height, at this stage I added rusty wire strips across the
front and glued it all down.
I printed my text out and coated the words with Glossy
Accents. When dry I attached the words
by folding the paper over the wire gluing in place. I found the words on the
internet but unfortunately have no idea who wrote it, cool saying though.
Finally I went over adding Ruby Glass Beads where I felt
the piece needed them and adding the Glass tear at the base.
Subscribe to:
Comments (Atom)


